Need Help?
Give us a call at 1-888-326-9244 and speak with an expert.
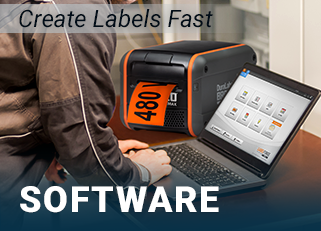
DuraSuite Labeling Software lets you create labels that comply with international and domestic labeling requirements.
There are two GHS label modules:
Both template formats contain primarily the same information, but they vary in their visual designs. These differences may make them non-compliant if the wrong layout is chosen. Layout should be selected based on the final destination of the chemical being labeled.
DuraSuite’s database contains approximately 1,500 pre-loaded chemical records used to populate the various fields of both the GHS and HazCom 2012 templates. You can edit existing chemical records and add new records.
DuraSuite provides a comprehensive list of Hazard Statements, Precautionary Statements, and Pictograms (as provided by the European Union); making it easy to edit chemical information and create new compliant chemical labels.
When you open DuraSuite, you will see the Module Selection screen. Click on Globally Harmonized System.
This will take you to another selection screen, where you can click either GHS International or HCS/HazCom 2012.
HazCom 2012 and GHS labels contain similar information. This information includes:
The placement of the information may vary depending on the size of the label.
Select a label size and layout by selecting the layout drop-down menu from the toolbar.
The chemical records in DuraSuite’s database are cataloged and searchable in several ways:
To search from the populated database, select the drop-down menu next to Database (A on graphic below). Click Browse, then double-click chemicals. To find a specific chemical, use the Search tools located on the right side of the toolbar.
To find the chemical name you want on your label:
The first search result is immediately displayed on the label. The status bar along the bottom of the screen (F on graphic above) displays the number of records that match the search criteria entered, e.g., “S”: “Found 145 records Displaying result number 1.”
NOTE: You can expand your search by placing an asterisk (*) at the beginning of your search string. This allows your string to be matched at any position in a chemical name or chemical identification number. For example, a search by chemical name for “*acid” yields the results “Dichlorophenoxyacetic acid”, “Ethylhexanoic acid,” and more. Just searching for “acid” without the asterisk returns no results because it is only searching for “acid” at the beginning of the chemical name.
When you search for a term in the Search box, a drop-down search results list appears below. This drop-down list is resizable so that you can see more of the search results. The resizing control is indicated by the two diagonal lines in the lower left corner of the search results box. To resize the box, click and drag the resizing control.
All information on a label can be edited. To edit an existing label, click the Edit Label button on the toolbar or use the Ctrl+E shortcut. Specific instructions on how to edit the label fields are in the section on “Populating a Chemical Label.”
IMPORTANT! Editing and saving an existing chemical will overwrite that chemical’s information in the database. If you don’t want to overwrite an existing entry but want to create a new entry, you must create a new label. GHS and HazCom 2012 share the same database, so changes to one module will affect both.
Deleting records: Using the Delete button on a chemical label will delete that chemical from the database. Only press the Delete button if you are certain you will no longer need to use that chemical record. To restore a deleted record, either create a record from scratch or reload the DuraSuite library, which will overwrite any custom labels you have created.
There are two edit modes for the two GHS-aligned modules: Basic Edit and Advanced Edit.
The Basic Edit mode is the default mode available when a new label is created. The Basic Edit mode is the easiest method of creating a label because it automatically populates the hazard pictograms, hazard statements and the signal word based on your choice of hazard categories.
The Advanced Edit mode allows you to manually change the hazard pictograms, hazard statements and the signal word. Unlike Basic Edit mode, these fields are not populated automatically.
The Advanced Edit button is located on the far-left side of the toolbar. Click on the button to toggle back and forth between Advanced and Basic Edit modes. When the button has a blue rectangle around it, it is in Advanced Edit mode.
IMPORTANT! For some labels created in Advanced Edit mode, it won’t be possible to enter Basic Edit mode. This happens with labels that have hazard statements that belong to more than one hazard category, or when converted hazard categories belong to the same hazard class.
If you are unable to find the chemical you are looking for, you can create a new chemical entry by clicking the New Label button on the DuraSuite toolbar. This creates a new label with blank, editable fields.
The following sections will describe how to enter and change information in the label fields. This process is almost the same whether you are creating a new label or editing an existing label. (The major difference is that if you are editing an existing chemical, the label fields will already have information present.) To make changes to these fields, you must be in either Create New Label mode or Edit Label mode.
NOTE: If you are creating a new label or editing an existing label, a Safety Data Sheet (SDS) will contain the relevant information you need to populate the label.
The GHS label and the HazCom 2012 label have different layouts, but the information they contain is very similar. In most of the following sections you will see images of both labels, so that you can see how the instructions apply to both labels.
These fields contain the name of the chemical and the relevant chemical identification numbers.
IMPORTANT! Hazard/Precautionery Statements should only be edited by users familiar with compliance requirements. These statements are compliant by default, so customization is not recommended.
DuraSuite’s database includes the entire library of hazard statements as provided by the European Commission for the Globally Harmonized Standard.
To edit hazard statements, click the edit button to the right of the Hazards Statements field. Depending on whether you are in Basic Edit mode or Advanced Edit mode (see the section on “Advanced and Basic Edit Mode” for more information), clicking this button will bring up one of two selection windows.
If you are in Basic Edit mode (the default mode when you create a new label), clicking the edit button next to Hazard Statements will bring up a Hazard Classes/Categories selection window. This window will allow you to select hazard categories, which are associated with pre-defined hazard statements, hazard pictograms, and signal words.
Expand the hazard heading by double-clicking the heading (e.g., Flammable liquids). You can expand all hazard headings by clicking the Expand All button. You can also collapse all hazard headings by clicking the Collapse All button.
Using your chemical SDS as a guide, click the box next to the desired hazard categories. The selected hazard statements will appear in the bottom part of the window, indicating they are chosen. When you are finished selecting hazards, click OK.
The hazard pictograms, statements and signal word will be automatically populated on the label, based on your choices of hazard categories.
If you are in Advanced Edit mode, the Hazard Statements menu will allow you to choose hazard statements from the complete list of statements.
Using your chemical SDS as a guide, select the appropriate hazard statements. To select a statement, either click the box next to the desired statement, or double-click the statement. Each statement selected will appear in the bottom half of the window.
When you are finished selecting statements, click OK. The hazard statements you chose now appear on your label template.
NOTE: Advanced Edit mode allows you to choose hazard statements without regard to the hazard categories. Also, Advanced Edit mode does not automatically populate the hazard pictograms and signal word based on your hazard statement choices. Because of this, the Advanced Edit mode requires a higher degree of knowledge to ensure edited labels meet chemical labeling requirements.
DuraSuite’s database includes the complete library of Precautionary Statements decided upon by the European Union.
To add precautionary statements to your label, click the button to the right of the Precautionary Statements field to open the Edit Precautionary Statements window, and then select appropriate entries from the menu that appears. With your choice highlighted, click the arrow to the right of the menu or double-click on the selected statement(s). When you are finished selecting statements, click OK.
The entries you chose now appear on your label template.
Sometimes the Hazard Statements or Precautionary Statements for a chemical will be too long to fit into the area provided by the label template. This will happen more frequently for the smaller labels. DuraSuite lets you know that the statements do not fit by filling the area with yellow as an alert.
An authorized person at your facility may decide how to edit the content to make it fit on the label while remaining in compliance.
The Supplemental Information field is only available in the GHS module. This optional field lets you supplement your label’s hazard and precautionary statements. It can contain cautionary statements, or anything deemed relevant to the work environment.
You must include the chemical supplier’s name and contact information on GHS and HazCom 2012 labels.
To edit the supplier information, click the button to the right of the Supplier Information field to open the Edit Supplier Information window. Enter the chemical supplier’s name, address and telephone number in the fields provided.
When finished, click OK. The supplier’s name is displayed on your label template and stored in the DuraSuite database. Whenever that same supplier is selected for other labels, the Supplier Information fields will be automatically populated with that supplier’s saved information.
NOTE: Supplier information will display differently on different labels. Some labels will have more room to fit more supplier information. Other labels will have less room and display less supplier information.
In Basic Edit mode (the default mode when creating a new label), the signal word cannot be manually changed because it is populated based on the chosen hazard statements. The signal word can only be changed in Advanced Edit mode. Changing the signal word should only be done by an authorized person at your facility.
To change the signal word in Advanced Edit mode, use the Signal Word drop-down menu to select either Danger or Warning. Your choice will be saved when you save the label.
In Basic Edit mode (the default mode for creating new labels), DuraSuite automatically populates the hazard pictograms based on the hazard statements that have been selected. In Advanced Edit mode (the default mode for editing existing chemical labels), you can add or remove pictograms manually. Changing hazard pictograms should only be done by an authorized person at your facility.
To edit pictograms in Advanced Edit mode, click the button to the right of the pictogram area to open the Edit Hazard Pictograms menu.
Move the pictograms you want on your label from the Available section to the Selected section by double-clicking it or using the arrow provided. You can also remove a pictogram from the Selected section by double-clicking it or using the appropriate arrow.
Click OK to add the selected pictograms to your label.
If you are finished editing your label, click the Save Label icon on your toolbar to save and display your label.
DuraSuite allows a GHS label to display a maximum of four hazard pictograms. (This is because regulations require a specific ratio of hazard pictogram size to label surface size.) The HazCom 2012 labels can display a maximum of five pictograms.
NOTE: If you require more hazard pictograms than the label templates can support, contact Graphic Products for assistance.
DuraSuite’s GHS-aligned chemical database has information (such as precautionary statements and hazard statements) in several languages. This allows you to switch back and forth easily between languages.
The Language Selection menu is on the right side of the toolbar. Clicking on this menu will show the available languages in a dropdown menu. Selecting a language will automatically switch any applicable preloaded information to the chosen language.
IMPORTANT! DuraSuite does not have the ability to translate user-provided text. It only has the ability to switch between its stored translations.
NOTE: This section does not apply to the DuraLabel Catalyst. For instructions on using that printer with the GHS/HazCom 2012 module of DuraSuite, please refer to the DuraSuite supplemental guide included with your DuraLabel Catalyst printer.
When preparing to print, be sure your DuraLabel printer is loaded with the correct supply size and type. GHS and HazCom 2012 labels require a special supply, with red diamonds pre-printed. The number of pictograms on the label will vary by chemical, and the supply for GHS labels must have the correct number of diamonds to match those pictograms.
For OSHA compliance, it is permissible to black out any extra diamonds on a HazCom 2012 label that would otherwise be empty (having no corresponding pictogram). This allows the use of label stock with up to five diamonds pre-printed, even when the chemical being labeled only needs one pictogram.
To take advantage of this option, go through the Tools menu to select Options. On the Module Settings tab of this window, check the box for “Force template to specific symbol count,” and choose the number of diamonds that are pre-printed on your label stock. Then, click OK, and continue printing.
Both GHS and HazCom 2012 label stocks for most of the DuraLabel printers use a special black-marked backing for label alignment. In order to print correctly, the printer will need to be set to look for those marks.
Select Print from the File menu. A Print Dialog box will appear; select your DuraLabel printer and click the Preferences button to check the printer’s settings. Make sure that the printer is set to use Labels with Marks. (For details on this setting, see your printer’s User Guide.)
If you have any questions about using DuraSuite label design software, get help from Graphic Products’ world-class support team by calling 800-788-5572 or visiting GraphicProducts.com. We’re here to help with all your labeling needs!