Need Help?
Give us a call at 1-888-326-9244 and speak with an expert.
The Arc Flash module uses a searchable, editable database to keep track of your equipment details, and simplify the task of creating arc flash warning labels that match the NFPA 70E and CSA Z462 standards.
Prefer video instructions? You can watch the tutorial here: How to Create Arc Flash Labels with LabelForge PRO
The Arc Flash module uses a searchable, editable database to keep track of your equipment details, and simplify the task of creating arc flash warning labels that match the NFPA 70E and CSA Z462 standards.
The toolbar across the top of the screen shows some common controls and options for the Arc Flash labeling module.
The fastest way to find a specific record in the Arc Flash database is with the toolbar’s search function.
The number in the white box on the toolbar shows which search result you are currently seeing; the number below the box shows the total number of search results. If you do not enter any search terms, you can browse through the entire current database.
To create a new entry in your current Arc Flash database, click the New Record button in the menu on the right. This creates a new, blank record. The Edit menu will slide out to let you add the details for this new material. This is where you will enter the details for the current label:
When the details have been entered, click the Save Database button to add your new entry to the Arc Flash module’s current database. The Save Label button will export your current label design to its own file, so you can adjust the design in the Label Designer module. If you want to remove the current record from the database, click the Delete Record button.
To print Arc Flash labels in different sizes, or to use custom templates, open the Label Settings menu and select the appropriate template with the drop-down Label Templates menu. The default templates are named so that the size of the label is shown first (with dimensions in inches).
In the same menu, you can also choose a font for the text of your label, and you can toggle optional label elements (such as grid lines or a border). You can also choose whether to print the colored stripe at the top of the label, or the header text and alert symbol; disable these options if you are using pre-printed label stock with those elements already in place.
This menu also lets you select which arc flash database you are using, if more than one database is available.
When you are ready to print, click the Print Settings button. Here, choose which labels you want to print, and how many copies of each. You can also check a Print Preview here.
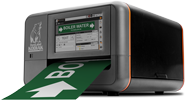
Click the Print button to start the new print job. If you are using the Kodiak’s built-in screen for your label designs, you can also press the physical Print button on the front of your Kodiak to print one copy of the current label, using the current print settings.
If you have any questions about using your DuraLabel Kodiak printer, get help from Graphic Products’ world-class support team by calling 800-788-5572 or visiting GraphicProducts.com. We’re here to help with all your labeling needs!